

Desktop Guide Factories
Introducing The BHive® Desktop Platform
Get familiar with The BHive® desktop platform. This video will give you a first overview of where to find the main features.
More detailed instructions of how to use The BHive® functionalities are provided below.
1. Get to know the desktop platform
Set up your account
-
After signing up for your The BHive® account, you received your user credentials. To log into your account on the desktop, please follow this link: https://login.thebhive.net/. Next, you will see the log in page, where you are asked to enter your custom The BHive® email address and the password you received from our team. Simply click "Log in" and that's it!
-
If you already changed your password and forgot it, please use the "Forgot Password" function on the login page.
-
We aim to make our platform accessible to speakers of different languages. No matter on what page you are in your desktop view of The BHive®, you can always find your language options in the top right corner. Click on the arrow pointing down next to your current language option and select between English, Spanish, Chinese, Vietnamese, Turkish, Portuguese, German, French, Italian, Japanese.
This is not a permanent change and will only last for the duration of your current login session. If you would like a different language to be displayed each time you log in, please do so by changing your default language.
The default language is the language The BHive® will automatically display each time after you log in. If you would like to change your default language, please head to the settings page. You can find it by clicking on the greay wheel displayed at the top right corner of any page in the desktop view. Below the headline "My Details" you can choose your default language.
Settings and Profile

Find your settings

Find your profile
-
Find your settings it by clicking on the grey wheel displayed at the top right corner of any page in the desktop view. On the settings page you can determine with which partner you want to share your inventories. You can also change your default language.
-
Please head to the settings page. You can find it by clicking on the greay wheel displayed at the top right corner of any page in the desktop view. Here you can decide, which partners you would like to share your inventories with.
1. Use the search bar to search for the name of your client. Sometimes, partners have several accounts from different country offices. In this case, please select the relevant account or contact your partner for more information.
2. Once you have found the partner you would like to share your inventories with, click "connect" on the right side next to the search bar. To connect with multiple partners, please search for them separately and connect with them each individually.Below the search bar you can now see a list of all the partners you are connected with. It shows you their name, role status and gives you the opportunity to insert the supplier ID provided by your partner.
-
If you decide to stop sharing your inventories with a partner, you can do so in the settings. Please head to the settings page. You can find it by clicking on the greay wheel displayed at the top right corner of any page in the desktop view. Simply choose the partner of interest from your list of connected partners and click "disconnect" on the right side of the table. The partner is now no longer able to view your inventories.
-
The default language is the language The BHive® will automatically display each time after you log in. If you would like to change your default language, please head to the settings page. You can find it by clicking on the grey wheel displayed at the top right corner of any page in the desktop view. Below the headline "My Details" you can choose your default language.
-
To view your profile, click "My Profile" in your main menu on the left side of your screen.
-
View and edit your profile details:
• Higg ID, Open Apparel Registry (OAR) ID, FFC ID
• Other IDs / Numbers
• Company address, Factory address
• Phone, Fax
• Factory mail address
• Business License -
Under "My Profile" you can view and edit your company details. There are text boxes for you to enter your company address, your factory address, phone number, fax number and factory mail address and business license.
-
Any IDs can be added under "My Profile". To view your profile, click "My Profile" in your main menu on the left side of your screen. There you can find several fields for you to upload your HIGG ID / Open Apparel Registry ID / Other IDs.
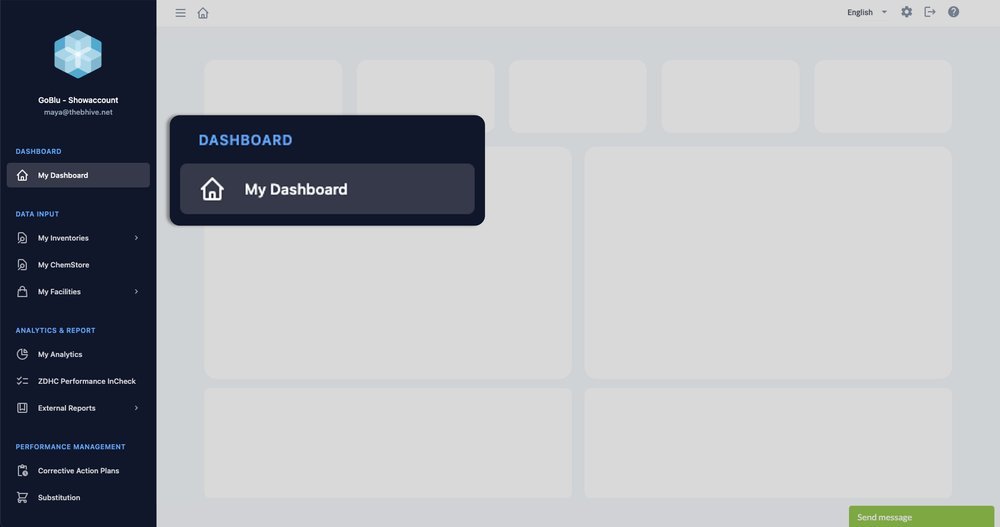
Dashboard
The Dashboard is the first page that will open after you log into your account. The "Home" symbol in the top left corner will always take you back to your Dashboard.
-
Get a first overview of your account. On the top you can see your start and end date and your compliance name. Also on your Dashboard are:
• Your unverified chemicals at a glance
• Your overall performance
• Connected brands and distinct formula count
• Download the data
• The BHive® information
• Brand information -
On your dashboard a table shows you and overview of your uploaded chemical products. Here, you can view your unverified chemicals at a glance, incl. the chemical name, manufacturer, consumption in kg and the count and any kind of remediation plan. On the bottom of the table you can click on the black arrow to show more rows.
-
On your dashboard you can see a chart of your overall performance over the last three months. To receive more detailed information, move your cursor over the bars.
-
If you would like to download any of the data shown in your dashboard, simply move your cursor over the chart or table. In the top right corner a cloud symbol will appear. When you click on this symbol, you will be able to select your preferred download method.
2. Data Input
Create/Add to an Inventory
-
You can edit the inventory of your current month. Until the 15th of your current month, you can also still edit the inventory of your previous month.
-
To create your chemical inventory, please head to "My Inventories" and then "Create/Add to Inventory" on the desktop platform. Our inventory creation flow is designed to be user friendly – by following the 6 steps, you are guided through the entire inventory process: From adding chemical products to your inventory, to uploading chemical detail information based on Safety Data Sheets, to editing the Consumption and Stock information.
For detailed instructions pn the six steps, please read the articles below. -
Click ”Create/Add to Inventory” in your main menu.
Select the month of the inventory you would like to edit.
Click “Continue”
-
You can imagine the inventory process as if you were shopping online: You browse through your input methods like through the different sections of an online shop. These are the methos you can use to add to your inevntory:
• Choose from a list of products you scanned with the mobile app
• Transfer chemical products from your previous inventories
• Search in My ChemStore among all chemical products that you have ever uploaded to The BHive.
• Use the Excel Upload function.
While clicking through the different input methods you fill up your virtual “shopping cart” – the preview of your inventory – with chemical products.
1. Click the “Choose Methods” buttons to start selecting products for your inventory.
2. Click the “Preview Inventory” button on the side to see, which products you have added to your inventory already.
3. Once you have added all products to your inventory, click the “Continue” button.
If you would like to see this process step by step, here is a video tutorial for you: https://youtu.be/-6bMtMt1UGY -
For detailed information on how to use the mobile app to scan chemical products, visit our Mobile User Guide.
We also have a video tutorial, on how to add chemical products you scanned with the mobile app to your inventory preview: https://youtu.be/8-RejMkW0Gc
Step by Step Guide:
1. Click ”Create/Add to Inventory” in your main menu.
2. Select the month of the inventory you would like to edit and click “Continue”
3. Choose "Add chemical products scanned via the mobile app" as your input method.
4. Here you can now see all chemical products that you scanned with your mobile app in the last two months. You can select chemical products for your inventory by clicking the little boxes to the right side of the table next to each chemical product.
5. To add the selected products to your inventory, you have to click the “add selection to inventory” button.
6. Now, you can see the product you just added in your preview inventory. -
Sometimes, your inventory might not change much from one month to the next. In that case, you can choose to transfer chemical products from a previous inventory.
If you would like to see this process step by step, here is a video tutorial for you: https://youtu.be/hAgeGPshRLA -
You can imagine My ChemStore like an encyclopaedia of all chemical products that you have ever uploaded to The BHive. The products are listed alphabetically. Here, you can search for specific products that you know you have uploaded to a previous inventory.
If you would like to see this process step by step, here is a video tutorial for you: https://youtu.be/wpU4_2Pgzo8Step by Step Guide:
1. Click ”Create/Add to Inventory” in your main menu.
2. Select the month of the inventory you would like to edit and click “Continue”
3. Choose "Search and select products from My ChemStore" as your input method.
4. Type the name of a chemical product or a chemical manufacturer in the search bar. The system shows you the result of your search in the table below.
5. To select a chemical product, click the box(es) to the right.
6. To add the product to your inventory, click the “add selection to inventory” button.
7. Now, you can see the product you just added in your preview inventory. -
The Excel Upload function is great if you want to upload many chemical products at once. This input method also makes it possible to upload your complete chemical inventory at once – including the chemical detail information from the SDS and the consumption and stock information.
If you would like to see this process step by step, here is a video tutorial for you: https://youtu.be/sKdsKVyliws
Step by Step Guide:
1. Click ”Create/Add to Inventory” in your main menu.
2. Select the month of the inventory you would like to edit and click “Continue”
3. Choose "Upload chemical products using our Excel template" as your input method.
4. Download the template file. You can only use this file to upload your chemical inventory here.
5. Fill out the cells one by one, making sure that you still to the instructions provided in row 7. You do not need to fill out all the cells, if you don‘t have all the data at hand. “Chemical Product Name” and “Chemical Formulator Name (manufacturer)” are the minimum requirements to upload a product via the Excel Upload.Important: You can only use this template to for the Excel Upload. This template follows the structure of the ZDHC CIL template.You must not edit the formatting of any of the cells. When filling out the cells, make sure to read the instructions for each cell in row 7. Here, you will find important notes on how you to fill in the information so that our system can recognize your data. If you are uploading chemical details information for a product, which you have uploaded to The BHive before, any existing chemical detail information will be updated through the Excel upload (also in your previous inventories).
6. Fill out the cells one by one, making sure that you still to the instructions provided in row 7. You do not need to fill out all the cells, if you don‘t have all the data at hand. “Chemical Product Name” and “Chemical Formulator Name (manufacturer)” are the minimum requirements to upload a product via the Excel Upload. Then, save the filled out file to yourr desktop.
7. Select the template, which you filled out, from your desktop.
8. Upload the template using the „Upload“ button.
9. If you have uploaded an excel template in this process before, you will get a warning message: Data for previously uploaded chemical products will be overwritten through the new Excel sheet, if it holds the same chemical products as the first sheet.
10. If you have made any mistakes within template, the system will show you an error message incl. the rows in which it found errors. Correct the errors in the template and upload it again.Excel Upload Results: Database matches: This table shows all the chemical products from your Excel template, that were matched automatically with The BHive database. View the Chemical Details and Consumption & Stock information by scrolling to the right within the table.
11. Check, if the system matched your chemical products correctly. Green marked products have been matched with The BHive database, black marked products have been marked as manually added products.
1. If the match is incorrect, click on “Correct Match”.
2. Search for the chemical product name in the search field.
3. Either, select the correct match, or select “add as manually added formula” if you cannot find the correct match. If you select “add as manually added formula”, the product will be moved into the second table titled “no database matches found”
Excel Upload Results: No database matches found: This table shows all the chemical products from your Excel template, that could NOT be matched automatically with The BHive database. View the Chemical Details and Consumption & Stock information by scrolling to the right within the table. The color coding supports you in adding the missing information. If the chemical product name is green and the manufacturer name is red, the system could already find the chemical product name in our database, but not the manufacturer name. If the chemical product name and the manufacturer name are both red, the system could match neither of them with our database yet.
12. Search for a possible database match of the products in this table.
13. Type the name of the chemical product. Pay attention to the spelling!
14. If you find the correct match, click the product name on the list. The product will then be renamed to your new database match and moved into the first table titled “Database matches”
15. Select “add as manually added formula” if you cannot find the correct match. The product then stay in the second table titled “no database matches found”
16. Select the chemical products from the first table.
17. Either choose to delete them from this list.
18. Or click the “Add selection to inventory” button to add them to your preview inventory.
19. Review the chemical products from the second table.
20. Either choose to delete them from this list.
21. Or add as manually added formula to add them to the list on top.
22. Now, you can see the product you just added in your preview inventory. -
Final check before you publish your inventory: Check if you uploaded all chemical products correctly. You can also upload more chemical products later, when you come back to the “Add Chemicals” page and select the month you would like to work on.
Step by Step Guide:
1. Switch between ”Database Formulas” and “Manually Added Formulas”
2. Check if you uploaded all chemical products correctly. You can go back to the second step if you want to add more chemical products to your inventory.
3. Select chemical products by clicking the boxes to the right.
4. By clicking the “delete selected” button, you will delete the products you previously selected.
5. Click the “Publish Inventory” button to upload the chemical products to your inventory. Please be aware that the chemical detail information you uploaded in Step 2 will be visible in all your previous and current inventories.
If you would like to see this process step by step, here is a video tutorial for you: https://youtu.be/9opzFM2MOUk -
The table of chemical products in each inventory holds a lot of inventory specific information. To edit this information, you have to click the "Continue to edit" button, whihcb is located above your inventory table. Then, continue to click to Step 5 of the inventory flow. Here you can edit the following information:
• Batch/Lot Number
• Purchase Date, Manufacture Date, Expiry Date
• Used for Customer
• Consumption (/month)
• Delivered Quantity (kg)
• Stock Volume, Minimum Stock, Maximum Stock
• Stock Location
• Storage Condition
• Fabric Roll ID/ Order No
To edit, you can choose between to input methods. Please watch our detailed video tutorials for more detailed instructions:
Manual Input of Stock & Consumption Data: https://youtu.be/kNDRqJiJuPI
Input of Stock & Consumption Data via Excel Upload: https://youtu.be/N5zZeRYDhnE
My Inventories - Overview

-
1. Click on "My Inventories" and then "Overview" in your main menu. By default, this page shows your most recent inventory.
2. Choose your chemical inventories by selecting a year and month on the top of the page. Years, months and quarters that do not contain any inventory data, are not listed.
3. Choose from the list of chemical inventories, which one you would like to view. -
Database and Manually Added Formulas View the chemical products, which were added to the inventory via the database or manually. The table holds a lot of inventory specific information, which can be edited by clicking on the pencil icon next to each chemical product:
• Batch/Lot Number
• Purchase Date, Manufacture Date, Expiry Date
• Used for Customer
• Consumption (/month)
• Delivered Quantity (kg)
• Stock Volume, Minimum Stock, Maximum Stock
• Stock Location
• Storage Condition
• Fabric Roll ID/ Order No
Filter Options: Under "Filter for Brand-Compliance" you can select the brand and filter by compliance, customer and the InCheck level. You can also adjust, which columns of the inventory you wish to view.
Confirm completeness & ZDHC Performance InCheck: Confirm that your inventory is complete to enable the creation of your monthly InCheck report (if you have an InCheck subscription). -
1. To filter for brand compliance in an inventory, please select the inventory you are interested in from the list on the "Inventory Reports" page.
2. A new page will open, showing you several details of your selected chemical inventory. At the top of the page you can see the headline "Filter for Brand Compliance". Here you can set different filters:
3. Select a Brand
4. Filter by compliance level (verfied vs. un-verified)
5. Filter by "Used for Customer"
6. Filter by InCheck Level
7. Select the visible columns of your inventory table
8. Based on your selection of filters, the table below will adapt. -
Some chemical products might not be included in The BHive database yet. In this case, you have to add them manually and they will be shown as manually added formulas in your chemical inventory. Manually added formulas are automatically marked as unverified, because there is no compliance information available for them at the moment of uploading. To request the updating of the compliance information of manually added formulas, please follow these steps:
1. Go to the chemical inventory, which includes your manually added formula.
2. In the table, which lists the chemical products in this inventory, click on "Manually Added Formulas".
3. Here you will find a column called "Verification Documents" - click on the blue cloud symbol to upload your verification documents.
4. An new pop-up window will open up. Please fill out all requested fields, select your document to upload, and make sure you tick the Terms and Conditions (T&C) box to be able to click the "Upload button".
Please note: only Test Reports and Certificates will be shown as verified in the system. For the other document types, we can add the information in the system for easier selection from the database, but they will be shown as unverified. -
1. To confirm the completeness of an inventory, please select the monthly inventory summary you are interested in from the list on the "Inventory Reports" page.
2. A new page will open, showing you several details of your selected chemical inventory. Below the filter options on top you can find a button titled "Confirm Completeness". When you toggle the button from "Incomplete" to "Complete", you confirm that you have completed your scanning for the current month. -
Choose how to downlaod a chemical inventory at the bottom of the inventory page.
My ChemStore
Under “My ChemStore” you can find a list of all chemical products that have ever been uploaded to your chemical inventories. Here, you can view and update chemical specific information and documents of all these chemical products.

-
1. Any information or documents specifically related to chemical products can be viewed and edited under "My ChemStore" in the main menu.
2. Search for the chemical product you are interested in in the serach bar at the top of the page.
3. Click on the name of the chemical product to view and edit the related information and documents.
4. Now, you have two options to add further information and documents.
Option A: Add information via SDS Reader
If available, start by uploading the SDS for the chemical product. The BHive can read and automatically fill in some of the information from the SDS.
1. Add the issue date of the SDS in the respective field.
2. Click the button "Select File to Parse" to upload the SDS from your computer.
3. Click the small box to the right to agree with the Terms and Conditions.
4. The SDS will appear below the upload options and next to the fields, where you can add more information. The BHive will automatically fill in as much information as possible from the SDS into these information. The fields, which were automatically filled by The BHive, will be marked through a grey background.
5. The information fields follow the structure of the ZDHC CIL. Go through each category and fill in any missing information from the SDS on the side. Do not forget to save your changes by clicking the blue button under the information fields after each category.
6. At the end you have the option to upload additional documents under the category "Documents".
Option B: Manually add information
1. You can add information manually by going through the different categories, which follow the structure of the ZDHC CIL, and filling in the missing information.
2. Click on the headlines (General, Foundational, Progressive, Aspirational, Documents) to switch between categories. Do not forget to save your changes by clicking the blue button under the information fields after each category.
3. At the end you have the option to upload additional documents under the category "Documents".
My Facility - Data & Documents
Upload and manage data and documents related to your facility's water, energy, health & safety and chemical management .

-
1. No matter on what page you are in your desktop view of The BHive®, you can always find your the main menu in the top left corner.
2. Click on the three horizontal lines next to the "Home" symbol to view your navigation menu.
3. Click on "My Facility" and choose from
o Water Management
o Enegery Management
o Chemical Management
o Health & Safety Management -
1. No matter on what page you are in your desktop view of The BHive®, you can always find your the main menu in the top left corner.
2. Click on the three horizontal lines next to the "Home" symbol to view your navigation menu.
3. Click on "My Facility" and choose "Water Management"
4. Here you can:
o Add information about your water sources and wastewater treatment
o Add data and documents related to your water consumption
o Add other relevant documents
o Upload your Wastewater Test Results -
1. No matter on what page you are in your desktop view of The BHive®, you can always find your the main menu in the top left corner.
2. Click on the three horizontal lines next to the "Home" symbol to view your navigation menu.
3. Click on "My Facility" and choose "Water Management"
4. Click on the heading "Wastewater Test Results".
5. Here you can view your previously added Wastewater Test Results. To enter new results, click the button "Enter test Results"
6. Fill in the General Information and upload the Wastewater Test Report Document.
7. Continue to fill in the results for Sum Parameters, Anions, Metals and ZDHC MRSL V1.1 Parameters for Wastewater.
8. The system automatically detects the limits (Aspirational/ Progressive/Failed). If a parameter exceeds the foundational limit or was found to have detection above the detection limit, set up a corrective action plan including deadlines.
9. Click ”Submit” at the end. -
1. No matter on what page you are in your desktop view of The BHive®, you can always find your the main menu in the top left corner.
2. Click on the three horizontal lines next to the "Home" symbol to view your navigation menu.
3. Click on "My Facility" and choose "Energy Management"
4. Here you can:
o Add information about your energy sources
o Add data and documents related to your energy consumption
o Add other relevant documents -
1. No matter on what page you are in your desktop view of The BHive®, you can always find your the main menu in the top left corner.
2. Click on the three horizontal lines next to the "Home" symbol to view your navigation menu.
3. Click on "My Facility" and choose "Chemical Management"
4. Here you can:
o Add data and documents related to your Chemical Management (NOT related to specific chemical products) -
1. No matter on what page you are in your desktop view of The BHive®, you can always find your the main menu in the top left corner.
2. Click on the three horizontal lines next to the "Home" symbol to view your navigation menu.
3. Click on "My Facility" and choose "Health & Safety Management"
4. Here you can:
o Add data and documents related to your Health & Safety Management
3) Analytics & Reports
My Analytics

find your overall analytics

find your inventory performance analytics
-
There are two types of Analytics you can view on The BHive desktop platform:
The analytics to a specific chemical inventory
1. Select "My Inventories" and "Overview" in your main menu.
2. Choose the time period of the inventory, you would like to view.
3. Choose your inventory entry.
4. At the top of thepage, click "Inventory Performance Analytics"
5. Choose from the list of standards, which analytics you would like to see and compare. The system will then show you the compliance of the chemical products in this specific inventory according to the standards you chose.
Analytics for my general performance over time
1. Select "My Analytics" in your main menu.
2. Customize your Analytics View by choosing from a list of standards and brand requirements and by adapting the time periods. The system will then show you the compliance of the chemical products uploaded in this specific time period according to the standards you chose.
ZDHC Performance InCheck

Find your zdhc performance incheck reports
-
To create InCheck Perfromance Reports using The BHive®, you need both an account for The BHive®, and a Gateway account.
If you do not have a The BHive® account yet, please create one here. Find more information on how to create a Gateway Account here. -
1. Once The BHive® and Gateway accounts are ready, log in to your The BHive® account and navigate to the user settings by clicking on the grey wheel in the top right corner.
2. Click the “Apply” button.
3. To continue, you need to accept The BHive® terms of use for the Performance InCheck Report.
4. Please log in with your ZDHC Gateway account, either by using your credentials or by using the access-key.
5. Now you need to fill out the application form.
6. After filling out the form, you will receive an email notification about the status of your request. You can also check your application status in the user settings of your The BHive® account. -
1. Once your subscription is confirmed, you can create the first Performance InCheck report. To do so, please navigate to "My Inventories" and then "Overview" in your The BHive® account.
2. Next, choose the month for which you want to create the Performance InCheck report. Please note that the last day of the selected month can only be maximum of 42 days ago.
3. Now, open the monthly summary and confirm that you have completed scanning the inventory of this month. The "Create InCheck" button is then activated.
4. When clicking the "Create InCheck Report" button, you are required to log in. There are two options:
1. You can log in with User Access Key obtained from your Gateway account.
2. You can log in with your ZDHC Gateway credentials.
5. Now, please match all your chemicals with the corresponding Gateway chemicals and fill in the consumption for the selected month.
6. If no corresponding chemical exists on the Gateway, you have the option to create a crowdsourced entry for your chemical. Please follow the steps below:
1. Click the button ″Enter Create Crowdsource″.
2. Match the manufacturer of your chemical with a known manufacturer on the Gateway. Alternatively, enter details for a new manufacturer.
3. Enter the details of your chemical.
4. Press ″Confirm″ to create the chemical on the Gateway. It will automatically be transferred to your InCheck inventory.
7. Next, please submit your inventory.
8. Upon receiving the Performance InCheck Report, you have the option to upload the PDF file to The BHive® system. This way you can view it directly in your browser. Saving the file will automatically redirect The BHive®. At the same time, the ZDHC Performance InCheck Report is also available for download on your ZDHC Gateway account.
4) Performance Management
Corrective Action Plans

-
First you need to add the chemical product to your CAP List
1. Go to “My Inventories” and then "Overview" in your main menu
2. Choose the inventory with the chemical product you would like to set up a CAP for is included.
3. Use the filter functions to view the type of chemical products, for which you would like to create a CAP
4. Tick the “Add to CAP” box.
5. Click “Add Selected Chemicals to CAP” at the bottom of your table.
Then you can set up the CAPs in your CAP List
1. Go to “Corrective Action Plans” in your main menu.
2. Use the search bar to search for the chemical product, for which yoiu would like to set up a CAP.
3. Click the "Show/Edit" button on the right side of the page.
4. In the new window, you can choose between:
o STOP using the product
o SUBSTITUTE with another product
o UPDATE compliance information
5. Fill in the relevant information and update any documents that are needed, depending on which corrective action you choose.
6. Set a deadline for the CAP and the current status.
7. Click "Save". -
There are two places, in which you can view the Corrective Action Plans which have been set up:
Dashboard
On your Dashboard, the table on the left side shows your list of unverified chemicals. When you scroll to the right side of the table, you can see if any remediation has been initiated incl. the deadline for the corrective action.
CAP List
1. Go to “Corrective Action Plans” in your main menu.
2. This page shows an overview of all chemical products, for which a CAP has been set up / is supposed to be set up in the future.
3. Use the search bar to search for any specific chemical product, for which you would like to view the CAP.
4. Click the "Show/Edit" button on the right side of the table to view and edit the CAP of the chemical product.
Substitution
-
1. No matter on what page you are in your desktop view of The BHive®, you can always find your the main menu in the top left corner.
2. Click on the three horizontal lines next to the "Home" symbol to view your navigation menu.
3. In the menu you can select "Substitution". This will lead you to the Chem Sec Marketplace. Here you can search for alternative chemicals using various filters.
4. For more detailed information on how to navigate the Chem Sec Marketplace, please click on the three horizontal lines in the top right corner.
5. In the menu, you can click on FAQ. In the FAQ you can for example find the "3-step guide to chemical substitution" and an explanation on "how it works".